From draft to data product
A data product starts with the records you want an application to receive.
For a small catalog, that might be id, name, price and currency.
This guide explains the connected workflow; publication and scheduled execution
need a separately configured operator-supported installation.
1. Define the source and its contract
Section titled “1. Define the source and its contract”In Workspace Studio, work in your assigned draft. A source needs extraction code, an input definition, an output schema and the appropriate execution profile. Choose HTTP or browser execution according to what the source requires.
Start with a small, recognizable sample. Do not infer completeness from the first page of a paginated site. Decide what missing fields and an empty result mean for this source.
2. Run, inspect and correct
Section titled “2. Run, inspect and correct”Open the implementation and Test draft. Save and run draft executes the saved version; inspect the returned records or follow the reported error back to the code. Repeat until the sample has the expected values and shape.
The first-draft tutorial teaches this loop with synthetic data. A successful draft test is evidence about that run and input, not certification of every page or scheduled execution.
3. Shape records and preview the API
Section titled “3. Shape records and preview the API”Open the product’s Records & API view. Choose the record fields, their types and the fields that identify one record. Map source fields into that structure. Reuse the relevant draft test sample and inspect Sample response.
Check that values have the expected type, keys identify records consistently, and fields intended for the API appear in the response. A sample from a previous run must not be mistaken for a result from your latest change.
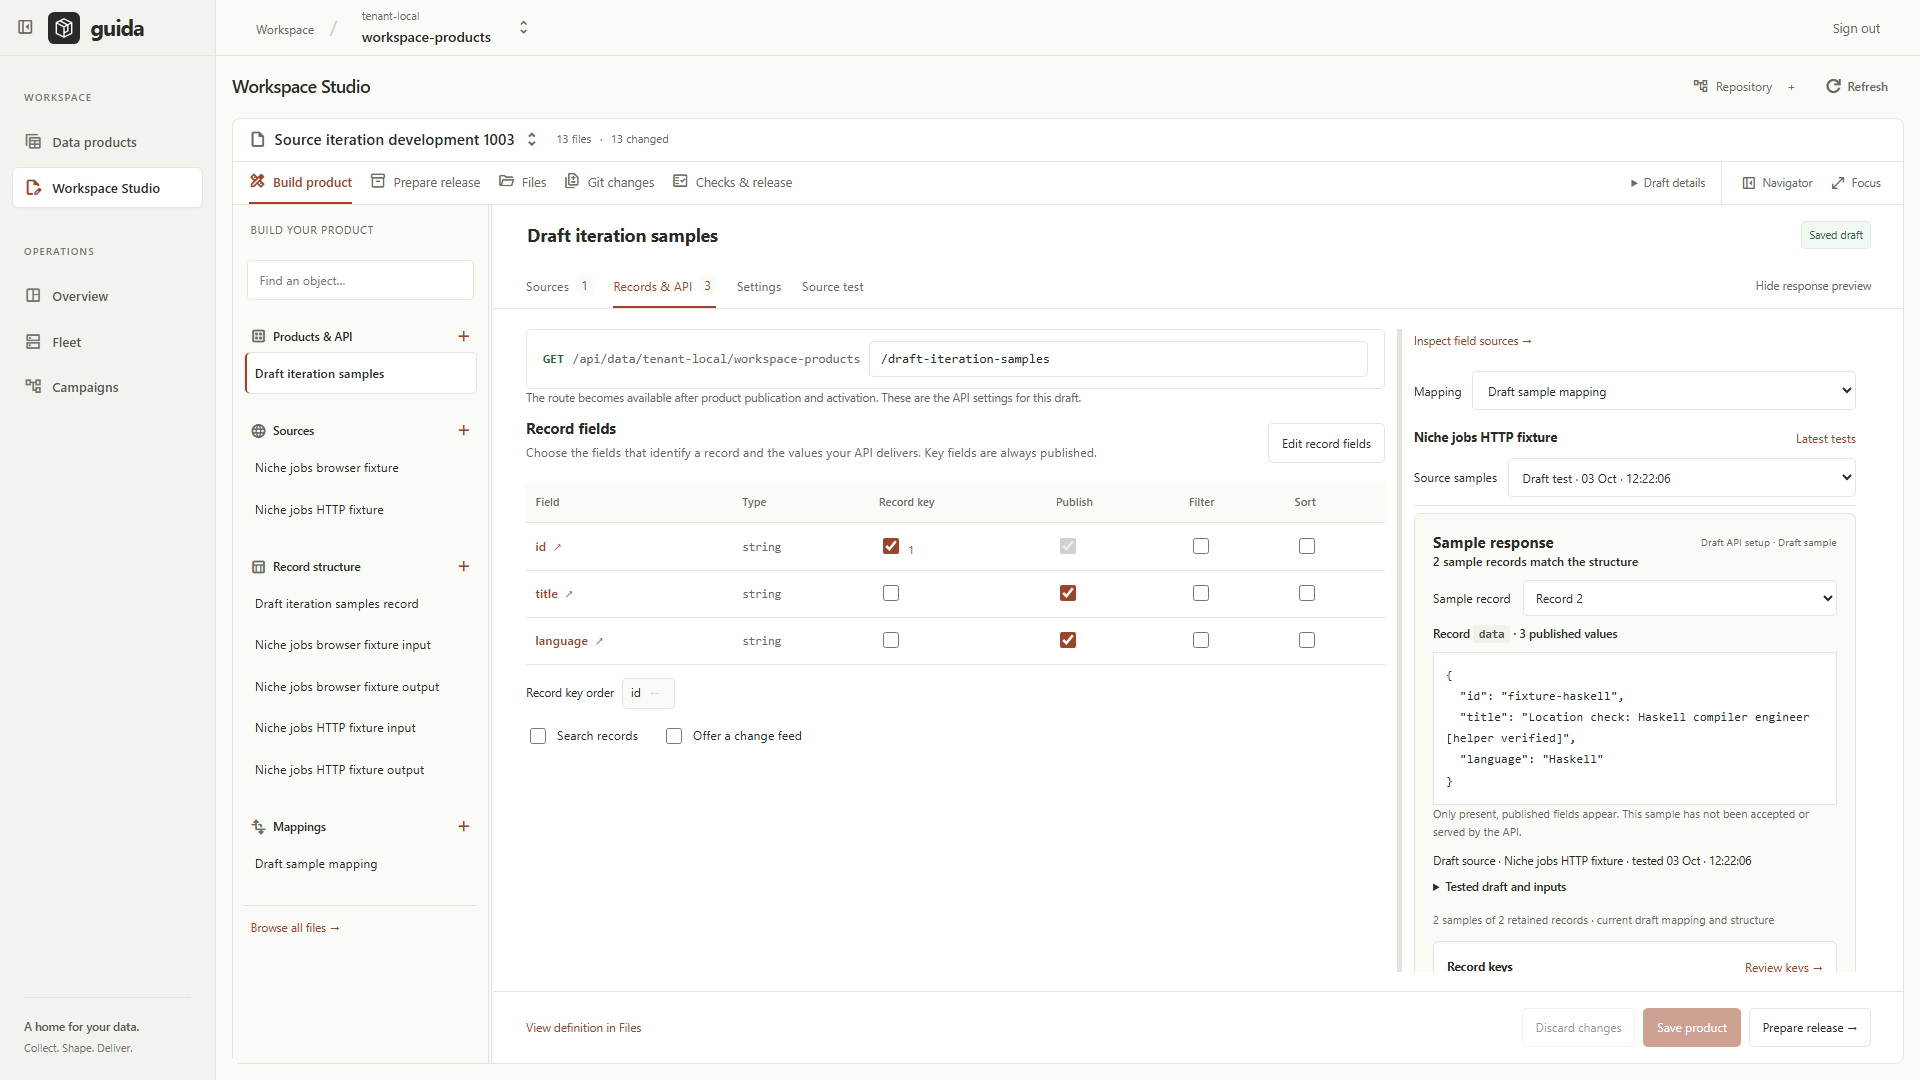
Actual development UI. This draft sample has not been accepted or served by the API.
4. Prepare the release with your operator
Section titled “4. Prepare the release with your operator”Use Prepare release and the Checks & release area to inspect the proposed changes and evidence. Resolve reported blockers. Follow the generated handoff for the matching authoring/signing tools and your installation’s publication procedure. Keep signing credentials with the authorized operator.
Release preparation, signing, publication and activation have distinct effects. Do not assume saving a product or seeing a sample response performs all of them. The current public tutorial deliberately ends before those operations.
5. Inspect accepted records
Section titled “5. Inspect accepted records”After the reviewed release, configured execution and product activation, use the product’s authenticated API to inspect accepted records. Compare those records with your intended contract and the execution outcome.
| Checkpoint | What it establishes |
|---|---|
| Saved draft | Your edits are persisted. |
| Successful draft test | That saved source ran for that input and produced the observed result. |
| Sample API response | The selected sample maps to the proposed API shape. |
| Published revision | The reviewed source snapshot is registered for authorized use. |
| Activated product and accepted records | Data is available through the configured product API. |
Earlier connected development walkthroughs exercised this broader journey. The published-image checks do not establish the same journey on a fresh installation.